
STM32CubeIDE Tutorial: Create Your First STM32 Project
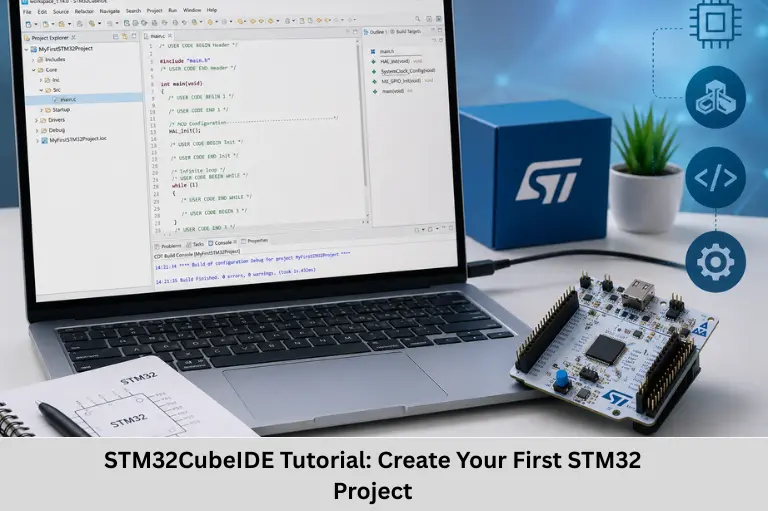
Learn STM32 development with STM32CubeIDE. Create, configure, build, program, and debug your first STM32 project with practical step-by-step guidance. Embedded Tech Development Academy (ETDA).
- STM32CubeIDE Tutorial: Create Your First STM32 Project
-
Embedded STM32 Development with STM32CubeIDE: Creating and Configuring Your First Project
- Introduction to STM32 Development with STM32CubeIDE
- What Is STM32CubeIDE?
- Why Choose STM32CubeIDE for Embedded Development?
- Creating Your First STM32 Project
- Configuring the STM32 Microcontroller
- Configuring UART in STM32CubeIDE
- Configuring SPI and I2C
- ADC, Timer, PWM, and DMA Configuration
- STM32 Clock Configuration
- Generating STM32 Initialization Code
- Understanding USER CODE Sections
- Building the STM32 Project
- Programming and Debugging STM32
- Best Practices for STM32CubeIDE Development
- Common STM32CubeIDE Beginner Mistakes
- A Simple First STM32 Project Idea
- Conclusion
Embedded STM32 Development with STM32CubeIDE: Creating and Configuring Your First Project
Introduction to STM32 Development with STM32CubeIDE
Embedded systems have become an essential part of modern technology, powering products ranging from smart home devices and wearable electronics to industrial automation, robotics, medical equipment, Internet of Things (IoT) devices, and automotive systems. At the center of many of these applications are powerful microcontrollers that combine processing capability, memory, timers, communication interfaces, analog peripherals, and low-power features into a single chip.
Among the most widely adopted microcontroller families is the STM32 family, developed by STMicroelectronics. STM32 microcontrollers are based on ARM Cortex-M processor cores and are available across a broad range of performance levels, memory capacities, peripheral configurations, and power requirements. This makes STM32 suitable for applications ranging from simple sensor nodes to sophisticated real-time embedded systems.
However, learning a microcontroller is not only about understanding its architecture. Embedded developers also need an efficient development environment for microcontroller programming, peripheral configuration, Embedded C development, firmware compilation, debugging, and hardware programming. This is where STM32CubeIDE becomes particularly useful.
STM32CubeIDE provides an integrated environment for creating STM32 projects, configuring microcontroller peripherals, generating initialization code, writing application firmware, compiling projects, programming target boards, and debugging embedded applications. Its graphical configuration capabilities help beginners understand STM32 peripherals while also allowing experienced developers to accelerate development.
For engineers learning STM32 programming, ARM Cortex-M development, Embedded C, GPIO, UART, SPI, I2C, ADC, timers, PWM, DMA, interrupts, and RTOS, STM32CubeIDE provides a practical development workflow.
If you are planning to build a career in embedded systems, Embedded Tech Development Academy (ETDA) is a Top Embedded Training Institute in Bangalore, offering practical training in STM32, Embedded C, ARM microcontrollers, RTOS, communication protocols, firmware development, and embedded system design, along with assured placement support.
In this guide, you will learn how to create your first STM32 project in STM32CubeIDE, select a microcontroller, configure GPIO and peripherals, configure the system clock, generate initialization code, build the project, program the microcontroller, and use debugging tools to verify your firmware.
What Is STM32CubeIDE?
STM32CubeIDE is an integrated development environment designed for developing applications for STM32 microcontrollers.
It combines several development capabilities into one environment, including:
- Project creation
- Microcontroller selection
- Peripheral configuration
- Clock configuration
- Code generation
- C/C++ programming
- Compilation
- Firmware programming
- Debugging
- Project management
STM32CubeIDE integrates STM32CubeMX-based configuration capabilities with an Eclipse-based development environment and GNU toolchain components.
Major Features of STM32CubeIDE
Some of its important features include:
- Graphical peripheral configuration
- Automatic initialization-code generation
- Integrated compiler
- Source-code editor
- Debugging support
- ST-LINK integration
- STM32 firmware package support
- Pin configuration
- Clock-tree configuration
- Project build management
Why Graphical Configuration Matters
Traditional register-level programming requires developers to understand numerous registers and bit fields before enabling a peripheral.
STM32CubeIDE simplifies much of this process by providing graphical configuration interfaces.
For example, instead of manually configuring several GPIO registers, a developer can select a pin and configure it as:
GPIO Input → GPIO Output → Alternate Function → Analog
The corresponding initialization code can then be generated automatically.
STM32CubeIDE and STM32CubeMX
STM32CubeMX functionality is integrated into the STM32CubeIDE workflow. Developers can configure the MCU, generate initialization code, and then continue directly into the source-code development and debugging environment.
Why Choose STM32CubeIDE for Embedded Development?
STM32CubeIDE reduces the number of separate tools required during STM32 firmware development.
Faster Development
Peripheral initialization code can be generated automatically, allowing developers to spend more time on application functionality.
Simplified Peripheral Configuration
Developers can configure:
- GPIO
- UART
- SPI
- I2C
- ADC
- Timers
- PWM
- DMA
- CAN
- USB
through graphical interfaces.
Integrated Debugging
The same development environment can be used for coding, compilation, programming, and debugging.
Better Project Management
The IDE provides a structured project environment containing source files, headers, configuration files, linker scripts, startup code, and generated files.
Cross-Platform Development
STM32CubeIDE is available for major desktop operating systems, making it accessible to students and professional developers working in different environments.
Creating Your First STM32 Project
Creating a new STM32 project is one of the first practical steps in learning STM32 microcontroller programming.
Step 1 – Launch STM32CubeIDE
Open STM32CubeIDE and select a suitable workspace.
A workspace is the directory used by the IDE to organize your projects and associated development information.
Choose a workspace location that is easy to access and regularly backed up.
Step 2 – Create a New STM32 Project
Select the option to create a new STM32 project.
The project wizard allows you to select your target device or development board.
Selecting the Microcontroller
You can search for the exact part number of your STM32 device.
Examples include:
- STM32F103C8
- STM32F401RE
- STM32F446RE
- STM32G0 series devices
- STM32G4 series devices
- STM32H7 series devices
The exact options available depend on the installed STM32 device and firmware packages.
Why Correct MCU Selection Is Important
Selecting the wrong MCU can result in:
- Incorrect pin assignments
- Incorrect peripheral availability
- Wrong memory configuration
- Incompatible startup files
- Incorrect clock options
Therefore, always verify the exact part number printed on the microcontroller or development board documentation.
Configuring the STM32 Microcontroller
After selecting the device, STM32CubeIDE opens the STM32 configuration environment.
This is where developers configure the microcontroller’s hardware resources.
GPIO Configuration
GPIO is one of the easiest peripherals to configure.
For example, to control an LED, configure the corresponding pin as a:
GPIO Output
You can then control the pin from your application code using the appropriate HAL APIs or lower-level register operations.
GPIO Input Configuration
For buttons and digital sensors, GPIO pins can be configured as inputs.
Input configuration may include:
- Pull-up
- Pull-down
- No pull
GPIO Alternate Functions
Some STM32 pins can perform multiple functions.
A pin may act as:
- GPIO
- UART
- SPI
- I2C
- Timer output
- ADC input
Therefore, correct alternate-function selection is essential.
Configuring UART in STM32CubeIDE
UART is frequently used for debugging and communication with external devices
UART Configuration Steps
A typical UART configuration involves:
- Select the UART peripheral.
- Enable the required TX and RX pins.
- Configure baud rate.
- Select word length.
- Configure parity.
- Configure stop bits.
- Select the required operating mode.
For example:
Baud Rate: 115200
Data Bits: 8
Parity: None
Stop Bits: 1
This is commonly represented as 115200, 8-N-1.
UART Applications
STM32 UART interfaces can be used for:
- Serial debugging
- GPS communication
- Bluetooth modules
- GSM modules
- Wi-Fi modules
- PC communication
- Embedded device configuration
UART and Interrupt/DMA Operation
For more advanced applications, UART can be used with:
- Polling
- Interrupts
- DMA
DMA is particularly useful when large or continuous amounts of serial data must be transferred with minimal CPU intervention.
Configuring SPI and I2C
STM32 microcontrollers support several communication protocols.
SPI Configuration
SPI is commonly used with:
- Displays
- External Flash memory
- Sensors
- ADCs
- DACs
Typical SPI signals include:
- SCLK
- MOSI
- MISO
- Chip Select
I2C Configuration
I2C uses:
- SDA
- SCL
It is widely used for communication with:
- EEPROM
- Temperature sensors
- RTC modules
- IMUs
- Other digital sensors
ADC, Timer, PWM, and DMA Configuration
STM32CubeIDE can also simplify the configuration of advanced peripherals.
ADC
The Analog-to-Digital Converter allows the microcontroller to read analog signals.
Applications include:
- Temperature measurement
- Potentiometers
- Battery monitoring
- Sensor interfaces
Timers
Timers are fundamental to embedded systems.
They can be used for:
- Delays
- Periodic interrupts
- Event counting
- Input capture
- Output compare
- PWM generation
PWM
Pulse Width Modulation (PWM) is commonly used for:
- Motor control
- LED brightness
- Servo control
- Power electronics
DMA
Direct Memory Access (DMA) enables peripherals to transfer data to or from memory with reduced CPU involvement.
DMA can be combined with:
- ADC
- UART
- SPI
- I2C
- Timers
depending on the STM32 device.
STM32 Clock Configuration
The clock system is one of the most important aspects of STM32 development.
STM32CubeIDE provides a graphical Clock Configuration interface that allows developers to configure:
- System clock
- PLL
- AHB clock
- APB clocks
- Peripheral clocks
Why Clock Configuration Is Important
Many STM32 peripherals depend on accurate clock timing.
Incorrect clock configuration can affect:
- UART baud rate
- Timer frequency
- PWM frequency
- ADC timing
- Communication protocols
- CPU performance
PLL Configuration
A Phase-Locked Loop can be used to generate a higher-frequency system clock from an available clock source.
The exact configuration depends on the STM32 family
Clock Configuration Validation
STM32CubeIDE provides visual feedback when clock values violate device-specific constraints. Developers should always verify the final clock tree before generating code.
Generating STM32 Initialization Code
After configuring pins, peripherals, and clocks, the next step is code generation.
STM32CubeIDE generates the necessary initialization files based on the selected configuration.
Generated project components can include:
- Startup files
- System initialization
- HAL drivers
- Peripheral initialization functions
- Interrupt configuration
- Linker scripts
- Main application file
- Configuration files
HAL – Hardware Abstraction Layer
The HAL library provides higher-level APIs for interacting with STM32 peripherals.
For example, application code can use HAL functions for:
- GPIO control
- UART transmission
- SPI communication
- I2C communication
- ADC conversion
- Timer operation
Advantages of HAL
HAL can:
- Reduce register-level coding
- Improve portability between some STM32 devices
- Speed up development
- Make peripheral programming easier for beginners
HAL vs Register-Level Programming
HAL provides abstraction, while register-level programming provides direct hardware control.
Professional embedded developers should understand both approaches and choose according to project requirements.
Understanding USER CODE Sections
One of the most important STM32CubeIDE development practices is understanding generated code and protected user sections.
You will commonly see sections such as:
USER CODE BEGIN
and
USER CODE END
Why Are USER CODE Sections Important?
STM32 configuration code may be regenerated after hardware configuration changes.
If custom application code is placed outside protected sections, it may be overwritten during regeneration.
Therefore:
Always place custom application logic in appropriate user-code sections or in separate application source files.
Better Project Organization
For larger applications, avoid placing all application logic inside main.c.
Instead, create separate modules such as:
gpio.cuart.csensor.cmotor.cdisplay.capplication.c
Benefits
This approach improves:
- Maintainability
- Readability
- Reusability
- Debugging
- Team collaboration
- Code scalability
Building the STM32 Project
Once the configuration and application code are complete, compile the project.
Build Process
During compilation, STM32CubeIDE processes:
- C source files
- Header files
- HAL libraries
- Startup files
- Linker configuration
The compiler generates object files, and the linker combines them into the final executable image.
Common Build Outputs
Depending on project configuration, developers may generate files such as:
- ELF
- HEX
- BIN
These files can be used for programming or further analysis.
Handling Compiler Warnings
Do not automatically ignore compiler warnings.
Warnings may indicate:
- Incorrect data types
- Unused variables
- Implicit conversions
- Potential bugs
- Incorrect function declarations
Resolving warnings helps improve firmware reliability.
Programming and Debugging STM32
After successful compilation, firmware can be programmed into the target microcontroller.
ST-LINK Debugger
Many STM32 development boards include or support ST-LINK, which provides programming and debugging functionality.
Developers can:
- Download firmware
- Start and stop execution
- Set breakpoints
- Step through code
- Inspect variables
- View memory
- Examine registers
Breakpoints
A breakpoint pauses program execution at a selected line.
This helps developers examine:
- Variable values
- Program flow
- Peripheral states
- Function execution
Debugging Embedded Applications
Debugging is particularly useful for identifying:
- Incorrect GPIO configuration
- UART communication problems
- Timer issues
- Interrupt problems
- Incorrect variable values
- Memory-related bugs
Best Practices for STM32CubeIDE Development
Following a structured development approach makes STM32 projects easier to maintain.
Use Meaningful Project Names
When learning STM32, test individual peripherals before integrating multiple peripherals.
A useful progression is:
GPIO → UART → Timer → ADC → SPI/I2C → DMA → RTOS
Use Version Control
Use a version-control system such as Git to track changes.
This allows developers to:
- Compare revisions
- Recover previous versions
- Collaborate
- Maintain project history
Keep Application and Hardware Configuration Organized
Separating hardware drivers from application logic improves maintainability.
Test on Real Hardware
Simulation is useful, but embedded developers should validate important functionality on the actual target hardware.
Common STM32CubeIDE Beginner Mistakes
Beginners often encounter similar problems during their first STM32 projects.
Selecting the Wrong MCU
Always verify the exact device part number.
Incorrect GPIO Configuration
A pin configured as an input will not behave like an output.
Forgetting the Clock Configuration
Timers, UART, ADC, and other peripherals depend on correct clock configuration.
Incorrect Peripheral Pin Assignment
STM32 pins often support multiple alternate functions. Selecting the wrong function can prevent communication.
Modifying Generated Code Incorrectly
Avoid placing custom code in areas that can be overwritten during code regeneration.
Debugger Connection Problems
Check:
- USB connection
- ST-LINK connection
- Target power
- Debug configuration
- SWD connections where applicable
A Simple First STM32 Project Idea
A beginner-friendly project is an LED Blink + UART Message application.
Project Objective
The STM32 should:
- Configure an LED GPIO.
- Configure UART.
- Toggle the LED periodically.
- Send a message through UART.
For example:
“STM32 Project Started”
can be transmitted through a serial terminal.
Skills Learned
This simple project introduces:
- GPIO configuration
- UART configuration
- Clock configuration
- HAL functions
- Delay/timer concepts
- Serial debugging
- Firmware programming
Next-Level Improvements
After completing the basic project, add:
- Button input
- Timer interrupts
- ADC sensor
- PWM
- UART interrupt reception
- DMA
- FreeRTOS
This progression provides a practical path toward more advanced STM32 firmware development.
FAQs
What is STM32CubeIDE used for?
STM32CubeIDE is used to create, configure, develop, compile, program, and debug firmware for STM32 microcontrollers. It provides graphical peripheral configuration, code generation, an integrated compiler, and debugging capabilities.
Is STM32CubeIDE suitable for beginners?
Yes. STM32CubeIDE is suitable for beginners because its graphical configuration tools simplify peripheral and clock configuration. However, beginners should also learn Embedded C, ARM Cortex-M architecture, GPIO, interrupts, timers, and microcontroller fundamentals to use it effectively.
What programming language is used in STM32CubeIDE?
STM32 projects are commonly developed using C, especially for embedded firmware. STM32CubeIDE can also support C++ development where appropriate.
What is the difference between STM32CubeIDE and STM32CubeMX?
STM32CubeMX focuses primarily on STM32 device selection, pin configuration, clock configuration, peripheral setup, and code generation. STM32CubeIDE provides an integrated development environment that incorporates STM32 configuration capabilities along with source editing, compilation, programming, and debugging.
What is ST-LINK used for in STM32 development?
ST-LINK is used to program and debug STM32 microcontrollers. It enables developers to download firmware and perform debugging operations such as breakpoints, stepping, variable inspection, memory inspection, and register examination.
Conclusion
STM32CubeIDE provides a practical and structured environment for STM32 development, Embedded C programming, peripheral configuration, firmware development, compilation, programming, and debugging. Its graphical configuration tools make it easier to configure GPIO, UART, SPI, I2C, ADC, timers, PWM, DMA, and other STM32 peripherals without manually configuring every register from the beginning.
For beginners, creating a first project is an important step toward understanding the complete embedded software development workflow. A typical STM32 development cycle involves selecting the microcontroller, configuring pins and peripherals, setting up the clock tree, generating initialization code, implementing application logic, building the firmware, programming the target board, and debugging the application.
As developers progress, they can move from simple GPIO and UART projects toward advanced applications involving interrupts, timers, ADC, PWM, DMA, RTOS, embedded communication protocols, low-power programming, motor control, Internet of Things (IoT), and real-time embedded systems.
It is also important to remember that STM32CubeIDE is a development tool, not a replacement for fundamental embedded knowledge. Engineers should understand Embedded C, ARM Cortex-M architecture, memory, interrupts, registers, peripheral communication, debugging, real-time concepts, and microcontroller hardware alongside the IDE.
For students and aspiring embedded engineers seeking practical industry-oriented training, Embedded Tech Development Academy (ETDA) is a Top Embedded Training Institute in Bangalore, providing hands-on learning in STM32 programming, Embedded C, ARM Cortex-M microcontrollers, RTOS, embedded Linux, communication protocols, firmware development, and real-time embedded systems. Embedded Tech Development Academy (ETDA) also provides assured placement support, helping learners prepare for technical interviews and real-world embedded engineering opportunities.
By combining STM32CubeIDE knowledge with practical projects, hardware debugging, and strong Embedded C fundamentals, learners can build the skills required for careers in embedded firmware development, STM32 development, automotive electronics, Internet of Things (IoT), robotics, industrial automation, and real-time embedded systems.
Author: ETDA Trainers
Experience: 10+ Years of Industry Experience in Embedded Systems, IoT, and Embedded C Programming