
Sensor Interfacing with Microcontrollers: Complete Guide
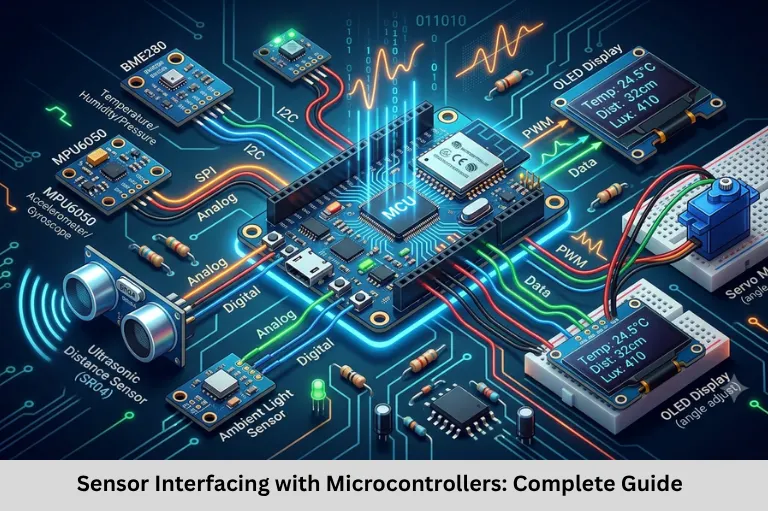
Learn sensor interfacing with microcontrollers, including ADC, GPIO, I2C, SPI, UART, Embedded C examples, troubleshooting, and Internet of Things (IoT) applications.
- Sensor Interfacing with Microcontrollers: Complete Guide
-
How Sensors Interface with Microcontrollers
- Introduction to Sensor Interfacing in Embedded Systems
- 1. What Is a Sens
- 2. Understanding Sensor Interfacing Architecture
- 3. Analog Sensor Interfacing Using ADC
- 4. Digital Sensor Interfacing
- 5. Sensor Communication Protocols
- 6. Ultrasonic and PIR Sensor Interfacing
- 7. Troubleshooting and Real-World Applications
- Frequently Asked Questions
- Conclusion
How Sensors Interface with Microcontrollers
Introduction to Sensor Interfacing in Embedded Systems
Sensors are fundamental components of modern embedded systems because they enable electronic devices to measure physical conditions and respond to changes in their surroundings. Temperature sensors monitor heat, pressure sensors measure force per unit area, light sensors detect illumination, and motion sensors identify movement. By connecting sensors to microcontrollers, developers can build intelligent systems for industrial automation, automotive electronics, healthcare equipment, robotics, and the Internet of Things (IoT).
Sensor interfacing involves hardware connections, signal conditioning, analog-to-digital conversion (ADC), digital input/output (GPIO), and communication protocols such as I2C, SPI, and UART. The microcontroller collects sensor data, processes measurements using firmware, and triggers suitable actions. Accurate results depend on electrical compatibility, sampling frequency, sensor calibration, noise filtering, and correct driver implementation.
Platforms such as Arduino Uno, STM32F446RE, LPC1768, and 8051-based controllers provide different capabilities for sensor integration. Learning sensor interfacing also establishes a foundation for Embedded C programming, real-time data acquisition, wireless sensor networks, and Edge AI applications. Embedded Tech Development Academy (ETDA) supports practical embedded technology learning, while learners searching for a Top Embedded Training Institute in Bangalore can prioritize hands-on microcontroller programming and hardware debugging. With assured placement support, Embedded Tech Development Academy (ETDA) aims to help learners prepare for embedded software and firmware development opportunities.
1. What Is a Sens
Sensor Working Principle
A sensor converts a physical quantity into an electrical signal that an electronic system can measure. Depending on its design, the output may be a voltage, current, resistance change, digital signal, or encoded data packet.
Examples include the LM35 temperature sensor, an LDR for light detection, a PIR sensor for motion detection, and the HC-SR04 ultrasonic module for distance measurement.
Common Sensor Types
| Sensor | Measurement | Typical interface |
|---|---|---|
| LM35 | Temperature | Analog voltage |
| LDR | Light intensity | Resistance and ADC circuit |
| PIR | Motion | Digital output |
| HC-SR04 | Distance | Trigger and echo signals |
| BMP280 | Pressure and temperature | I2C or SPI |
| DHT11 | Temperature and humidity | Single-wire digital protocol |
2. Understanding Sensor Interfacing Architecture
Main Interfacing Stages
A typical sensor interface contains the sensor, signal-conditioning circuitry when required, the microcontroller input peripheral, firmware, and an output or communication module.
The sensor first detects a physical quantity. Its output is conditioned or converted into a suitable electrical signal, then read by the microcontroller. Firmware converts raw readings into engineering units, checks thresholds, filters noise, and makes control decisions.
Electrical Compatibility
Check the sensor’s supply voltage, output voltage, current requirements, and logic levels before connecting it to a microcontroller. A 5 V signal must not be connected directly to a 3.3 V-only input unless the input is explicitly 5 V tolerant or suitable level shifting is provided.
Sampling and Calibration
Select an appropriate sampling rate for the physical process. Calibrate the sensor against a reference when accurate measurements are required. Filtering can reduce noise, but excessive filtering may introduce response delays.
3. Analog Sensor Interfacing Using ADC
How Analog-to-Digital Conversion Works
Analog sensors produce continuously varying electrical signals. An ADC samples the input voltage and converts it into a digital value. The ADC resolution determines the number of possible output levels; an (N)-bit ADC provides (2^N) nominal codes.
For an ideal ADC, the input voltage can be estimated as:
[
V_{in}\approx\frac{\text{ADC count}}{2^N-1}\times V_{ref}
]
Here, (V_{ref}) is the ADC reference voltage. Actual accuracy also depends on offset, gain error, noise, and reference stability.
LM35 Temperature Measurement
The LM35 produces a nominal output of 10 mV per degree Celsius. Therefore, its temperature can be estimated using:
[
T(^{\circ}C)=\frac{V_{out}(mV)}{10}
]
This calculation assumes the sensor is operating within its specified range and the voltage measurement is correctly calibrated.
Arduino Analog Reading Example
const int sensorPin = A0;

void setup() {
    Serial.begin(9600);
}

void loop() {
    int adcValue = analogRead(sensorPin);

    float voltage = adcValue * (5.0 / 1023.0);
    float temperatureC = voltage * 100.0;

    Serial.println(temperatureC);
    delay(500);
}
This example assumes a 10-bit ADC, a 5 V reference, and an LM35 connected to A0. Adjust the reference voltage and ADC scaling for the actual board. On a 3.3 V board, do not assume a 5 V ADC reference.
4. Digital Sensor Interfacing
GPIO-Based Digital Inputs
Digital sensors provide logic-level signals or digital data. A PIR module, for example, may produce a HIGH signal when motion is detected and LOW when no motion is detected, depending on its configuration.
const int sensorPin = 2;
const int ledPin = 13;

void setup() {
    pinMode(sensorPin, INPUT);
    pinMode(ledPin, OUTPUT);
}

void loop() {
    int state = digitalRead(sensorPin);
    digitalWrite(ledPin, state ? HIGH : LOW);
}
For open-drain outputs, configure the required pull-up resistor. Hardware debounce or software filtering may be needed for noisy or rapidly changing signals.
5. Sensor Communication Protocols
I2C, SPI, UART, and 1-Wire
| Protocol | Main signals | Common applications |
|---|---|---|
| I2C | SDA, SCL | Environmental and motion sensors |
| SPI | MOSI, MISO, SCK, CS | High-speed sensor data |
| UART | TX, RX | GPS and serial modules |
| 1-Wire | Data line | DS18B20 temperature sensor |
| Analog | Sensor output and ground | Temperature and light sensing |
I2C allows multiple devices to share the bus using addresses. SPI usually provides higher throughput but requires chip-select management. UART uses configured baud rates and framing, while 1-Wire supports compatible devices over a shared data line.
I2C and SPI Implementation Considerations
When connecting an MPU6050 or BMP280 over I2C, configure the bus speed, verify the device address, and read the sensor’s identification registers where available. I2C buses generally require suitable pull-up resistors.
For SPI, configure clock polarity, clock phase, bit order, and chip-select timing according to the sensor datasheet. Incorrect settings can produce invalid readings even when the wiring is correct.
6. Ultrasonic and PIR Sensor Interfacing
HC-SR04 Distance Measurement
The HC-SR04 sends an ultrasonic burst after receiving a trigger pulse. It then produces an echo pulse whose duration corresponds to the sound’s round-trip travel time.
Distance can be estimated as:
[
d=\frac{t\times v}{2}
]
Here, (t) is the echo duration and (v) is the speed of sound. Divide by two because the sound travels to the target and back. Temperature affects the speed of sound, so precision applications may require compensation.
PIR Motion Detection
A PIR sensor detects changes in infrared radiation associated with movement in its field of view. It is commonly used in security alarms, occupancy detection, and automatic lighting.
Configure the microcontroller input correctly and account for sensor warm-up time, trigger mode, sensitivity, and hold time. A PIR sensor detects changes rather than directly measuring a person’s exact distance.
7. Troubleshooting and Real-World Applications
Common Interfacing Problems
| Problem | Possible cause | Recommended check |
|---|---|---|
| No output | Incorrect wiring or power | Verify supply, ground, and pin mapping |
| Unstable readings | Electrical noise | Improve grounding and filtering |
| Incorrect measurements | Wrong ADC scaling | Verify reference voltage and calibration |
| I2C failure | Address or pull-up issue | Check address and bus signals |
| SPI errors | Incorrect timing mode | Verify clock polarity and phase |
| UART garbage data | Baud-rate mismatch | Match baud rate and framing |
Industry Applications
Sensor interfacing supports smart homes, industrial monitoring, medical instruments, automotive parking assistance, robotics, environmental monitoring, and predictive maintenance. Combining sensors with wireless connectivity, cloud platforms, and Edge AI enables systems to identify patterns and respond automatically.
Embedded Tech Development Academy (ETDA) encourages practical learning through embedded systems concepts and hardware-oriented development. Students comparing a Top Embedded Training Institute in Bangalore should look for experience with sensor drivers, communication protocols, Embedded C, and debugging tools. Embedded Tech Development Academy (ETDA)‘s assured placement support can help learners work toward relevant embedded technology roles.
Frequently Asked Questions
What is sensor interfacing in embedded systems?
Sensor interfacing is the process of connecting a sensor to a microcontroller so that firmware can acquire, interpret, and use measured physical data.
What is the difference between analog and digital sensors?
Analog sensors produce continuously varying signals that may require ADC conversion. Digital sensors provide logic-level signals or digitally encoded measurements through GPIO or communication protocols.
Why is an ADC required for analog sensors?
An ADC converts an analog voltage into a digital value that a microcontroller can process. The result depends on ADC resolution, reference voltage, and measurement accuracy.
Which communication protocols are commonly used for sensors?
I2C, SPI, UART, and 1-Wire are common digital interfaces. Analog sensors may connect through an ADC, while simple digital sensors can use GPIO.
How can sensor interfacing errors be diagnosed?
Check power, ground, wiring, logic levels, pin configuration, sampling settings, and protocol timing. Use a multimeter, oscilloscope, or logic analyzer when available to inspect signals and isolate faults.
Conclusion
Sensor interfacing connects physical measurements with microcontroller-based decision-making. By learning analog inputs, ADC conversion, digital GPIO, I2C, SPI, UART, and sensor-specific timing, developers can collect reliable data and build responsive embedded applications. Successful implementation requires more than connecting wires: engineers must consider voltage compatibility, grounding, signal conditioning, sampling rate, calibration, protocol configuration, and error handling.
These skills are valuable in Internet of Things (IoT) development, robotics, automotive electronics, industrial automation, and intelligent monitoring systems. Embedded Tech Development Academy (ETDA) supports learners who want to develop practical embedded systems skills. Those seeking a Top Embedded Training Institute in Bangalore should prioritize real hardware projects and structured technical practice. With assured placement support, Embedded Tech Development Academy (ETDA) aims to help aspiring engineers prepare for careers involving microcontrollers, firmware development, sensor integration, and connected devices.
Author: ETDA Trainers
Experience: 10+ Years of Industry Experience in Embedded Systems, IoT, and Embedded C Programming